To install fonts on Windows, unzip the download, right-click the .ttf or .otf file, and choose Install. The font is then available in Word, Photoshop, Canva’s desktop app, and most other programs, usually after you reopen them. This guide covers every method on Windows 10 and Windows 11, how to install many fonts at once, and what to do when a font refuses to show up.
Before you install: check the file
Most failed installs come from the file, not from Windows. Take a minute to check three things.
- Unzip first. Fonts usually arrive in a ZIP. Right-click it and choose Extract All. Windows cannot install a font from inside a compressed folder.
- Look for TTF or OTF. These are the formats Microsoft’s own instructions mention for desktop installs. WOFF and WOFF2 are web formats, so skip them.
- Read the license. A font can install perfectly and still not be allowed in your logo or product. Fonts under the SIL Open Font License, which covers most of Google Fonts, are free for commercial use. For anything else, read the terms on the download page.
Need a place to start? Browse the UrbanFonts font library or a category such as serif fonts, and check each font’s license before you use it commercially.
Method 1: right-click and Install
This is the fastest route and works on both Windows 10 and 11.
- Open the extracted folder.
- Right-click the font file (for example Lora-Regular.ttf).
- Choose Install. On Windows 11 you may need to click Show more options first.
- Wait a few seconds. There is no progress bar and often no confirmation.
You can select several files at once. Click the first, hold Shift and click the last, or press Ctrl+A inside the folder, then right-click and choose Install. Installing every weight in a family (Regular, Bold, Italic) means they all appear properly in your apps’ font menus.
Install vs. Install for all users
If you are an administrator, the right-click menu also offers Install for all users. The difference matters.
| Option | Who can use the font | Where it is stored | Admin rights needed |
|---|---|---|---|
| Install | Only your account | AppDataLocalMicrosoftWindowsFonts in your profile | No |
| Install for all users | Every account on the PC | C:WindowsFonts | Yes |
Per-user installs are what you get on a work computer where you cannot make system-wide changes. If a program does not see a font you installed for your account only, try Install for all users.
Method 2: preview window
Double-click the font file. Windows opens a preview window showing sample text at several sizes. Click Install at the top left. This is useful when you want to see what a font looks like before committing, or when you downloaded several fonts and are not sure which file is which.
Method 3: drag and drop in Settings
- Open Settings and go to Personalization, then Fonts.
- Find the box labeled Add fonts (it says to drag and drop to install).
- Drag one or more font files from File Explorer into that box.
The same page lists everything already installed. Click a font family to see its styles, a preview, and the option to uninstall it. It is also the easiest place to check whether an install actually worked: use the search box at the top and type the font’s name.
Method 4: get fonts from the Microsoft Store
On the same Fonts page, select Get more fonts in Microsoft Store. Choose a font and click Get or Buy. According to Microsoft’s font guide, the font downloads and installs automatically, with no unzipping. The selection is smaller than what you will find on font websites, but it is the simplest option for non-technical users.
See it in action
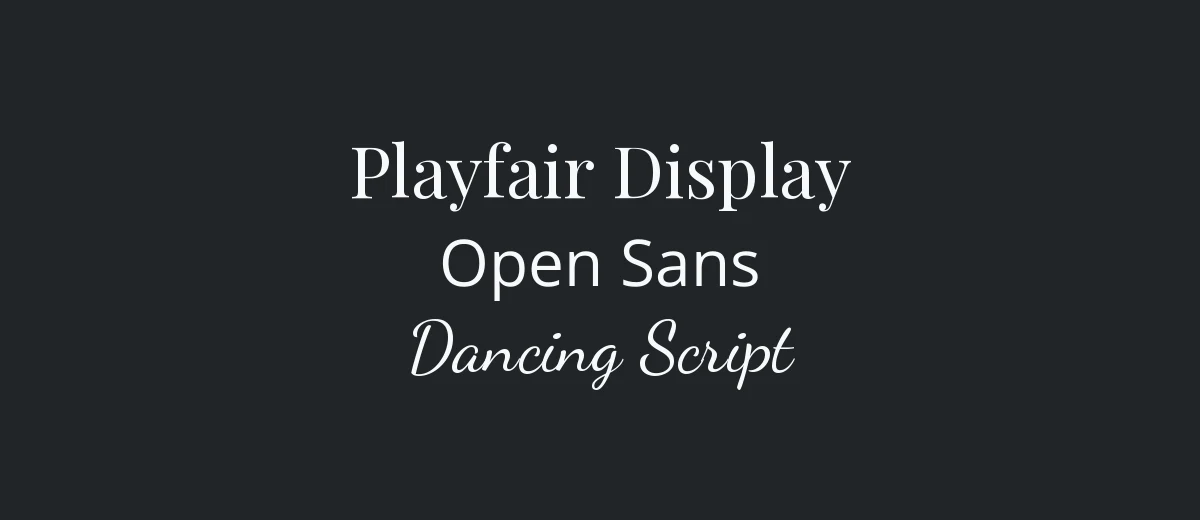
Once installed, a font appears by name in the font menu of every app that supports custom fonts. Fonts with many styles are grouped together under one family name.
Check that the font works
- Close and reopen the program you want to use it in. Word, PowerPoint, and Photoshop only read the font list when they start.
- Open the font menu and type the font’s name. Use the family name, such as “Lora”, not the file name.
- If you still cannot find it, open Settings > Personalization > Fonts and search there. If it is listed there, Windows installed it and the problem is the app.
Some apps cache fonts and do not refresh until you sign out and back in. A full restart almost never helps beyond that.
Troubleshooting common problems
| Problem | Likely cause | Fix |
|---|---|---|
| Install is missing from the right-click menu | File is still inside a ZIP, or it is not a font file | Extract the ZIP, then right-click a .ttf or .otf file |
| “Not a valid font file” | Corrupted download, or a web font format | Download again, and choose the TTF or OTF version |
| “Font is already installed” | The same font exists on your PC | Uninstall the old copy in Settings > Personalization > Fonts, then reinstall |
| Installed but not in my app | App was open during the install | Close and reopen the app |
| Only one style shows up | You installed one file out of a family | Install the Bold, Italic, and other files too |
| Font is in the app but looks wrong | Symbol or icon font, or a missing glyph | Test in Notepad or Word, and try a different font file from the family |
Not every program supports custom fonts. Microsoft’s guide notes that if a font does not appear in one app, you should try another to confirm the font itself installed correctly. If you are using the font in Microsoft 365 apps, see how to change the default font in Outlook to make it your everyday choice.
Remove or hide a font
Go to Settings > Personalization > Fonts, click the font family, and choose Uninstall. Removing fonts you no longer use keeps your menus manageable. Do not delete system fonts such as Segoe UI, Arial, or Calibri, because Windows and apps rely on them.
Installing fonts from a family folder
Font downloads often contain a folder of static files (one per weight and style) and sometimes a variable font file whose name includes square brackets, such as Inter[opsz,wght].ttf. Install the static files if your app is older, or if you want each weight to appear as its own menu entry. Install the variable file if your app supports it, since one file covers many weights. Installing both is possible but can crowd your menus with duplicates.
Identify a font you cannot name
If you only have an image of the font, work out its name first and install it afterward. Our guide to finding a font from an image covers six methods that work.
Frequently asked questions
Do I need to restart my computer after installing a font on Windows?
No. A restart is not needed. You only need to close and reopen any app that was running during the install, such as Word, Photoshop, or your browser, because most apps read the font list when they start.
What is the difference between Install and Install for all users?
Install adds the font only for your own Windows account. Install for all users puts it in the system fonts folder so every account on the PC can use it, and it needs administrator permission.
Can Windows install WOFF or WOFF2 fonts?
Not reliably. WOFF and WOFF2 are web font formats meant for websites. For desktop apps, download the TTF or OTF version of the font instead.
Where do installed fonts go on Windows?
Fonts installed for all users are stored in C:WindowsFonts. Fonts installed for your account alone are stored in your user profile under AppDataLocalMicrosoftWindowsFonts.
Is it legal to install any font I download?
Installing a font on your own computer is normally fine, but using it in a logo, product, or client work depends on its license. Fonts under the SIL Open Font License, such as most Google Fonts, allow commercial use. For anything else, read the license on the download page.